Project Details – Teak Shower floor
We worked closely with the customer to ensure the measurements provided were accurate. She mailed us a template of her floor. This was ideal in ensuring the proper cuts were made and the floor once installed fit. Since she was in another state.
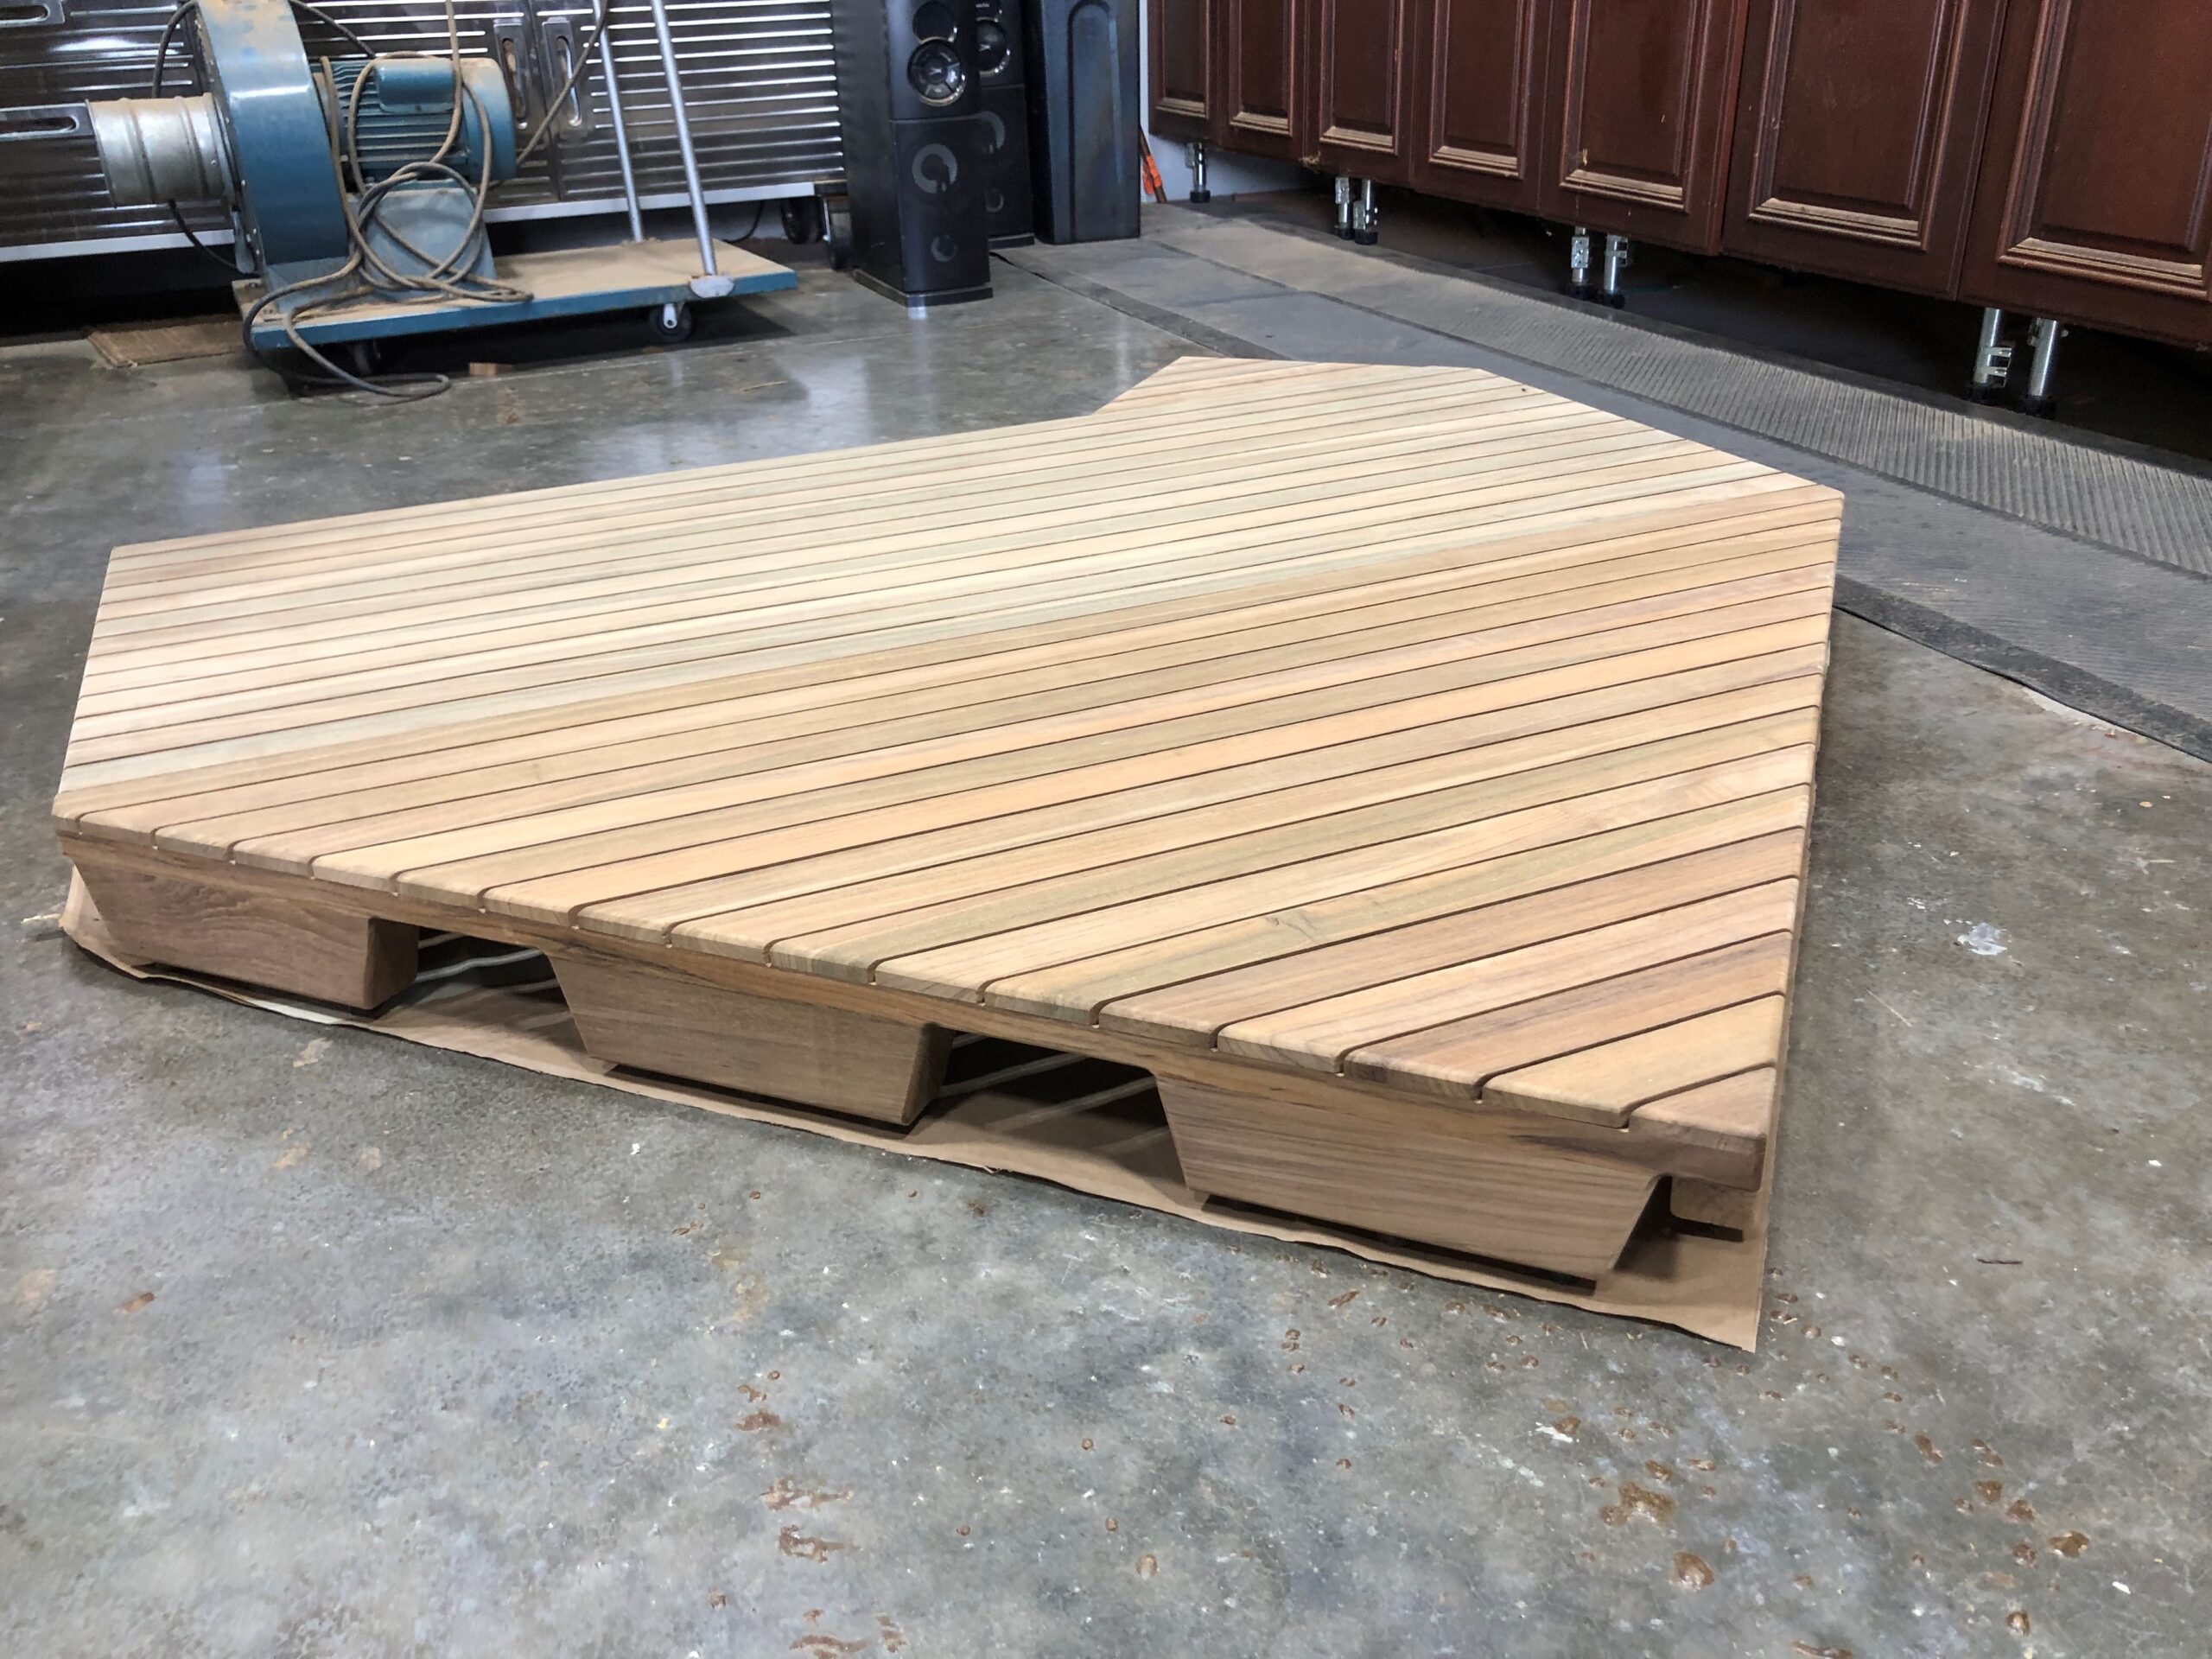
We started by milling all the material for each floor. Then hand selecting each batten to ensure it was free of any imperfections. Once this was done each floor was laid up and assembled.
It was determined this particular floor had to made into three separate pieces. Each piece was spaced out evening to butt up to one another to mimic one seamless piece. By making the panels into multiple pieces, this allows for easier removal of floor to clean the underside.
Project Details Continued – Teak Shower floor
As each piece was assembled we carefully measured them to our template provided to us by the customer. When making our floors, we always ensure a 1/4″-1/2″ variance all around the floor to allow for any uneven walls and easy installation.
Not only did we have to ensure the floor fit the template we had to build up the floor to 4″ in height. This is an additional 2″ added to the floor based on our standard height floors at 2″ tall. It was critical to ensure each angle was cut accurately as well as accounting for the variance.
With patience and time we were able to accomplish the task in making the floor fit to perfection. When we heard from the customer once she received it she was amazed on how it fit so perfect.
If you are interested in elevating your shower floor or have an unusual shape, reach out to us with a photo or drawing and we can take a look at if it is something we can do. Reach out to us at CaribTeak.com or info@caribteak.com. We look forward to working with you on your next project!
Teak floor installed
Teak Floor- Multiple pieces
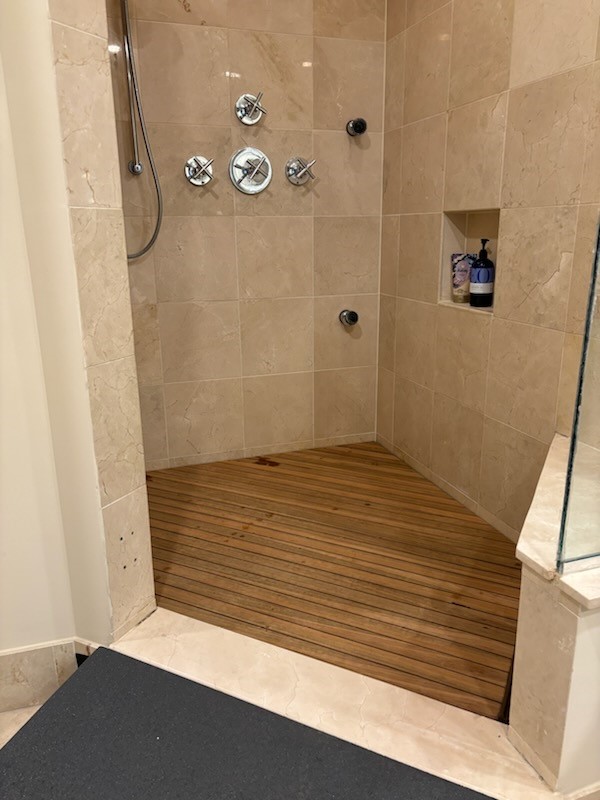
Custom Teak Shower floor

Sanded with Eased Edge - Teak Shower floor
